

Applying a LetsEncrypt Certificate in NSX-T Manager

By now, you may have heard of the free non-profit Certificate Authority (CA) service known as LetEncrypt. The service offers anyone access to certificates that are signed and trusted by most modern web browsers default certificate store. The best part…they’re free!
In my case, I’m interested in a wildcard certificate that I can apply to my entire lab environment.
Installing Tools
The first step is to install a tool called Certbot, which will be used to request a certificate from LetsEncrypt. In my case, I’m using MacOS so I will perform the installation using brew, but instructions are available for Windows and Linux as well.
$ brew install certbot
You can verify that brew has correctly installed certbot by checking the version installed:
 $ certbot --version
 certbot 0.34.2
Requesting the wildcard certificate from LetsEncrypt
The next step is to generate the certificate. In my case, I will be creating a wildcard certificate for another domain that I own, andyjs.ch:.
$ sudo certbot certonly --manual --preferred-challenges=dns --email <your_email> --agree-tos -d *.andyjs.ch
where
- sudo is required on my Mac to perform this action, your mileage may vary.
- The certonly parameter specifies that the certificate will be generated, but not installed on the end system. We will do this manually in NSX-T Manager.
- –preferred-challenges=dns – I used DNS to validate ownership of the domain, through a TXT record (more on this below). I believe this is the only method available for wildcard certificates.
- –email – Enter your email address
- –agree-tos – Agree to LetsEncrypt’s Terms of Service
- -d enter the domain requiring the wildcard certificate, preceded by an asterisk to designate a wildcard certificate
If the syntax of the command is correct, Certbot will request that you provide a DNS TXT record with a specific value to authenticate domain ownership:
 Please deploy a DNS TXT record under the name
 _acme-challenge.andyjs.ch with the following value:

 jTyGIA9fojzT3n1EFxGxCj_2wUudkVg6pN7zSVACE

 Once this is deployed,
 Press ENTER to continue
In my case, I added a TXT record to my Domain Provider GoDaddy and validated that it was successfully added via a host command:
 $ host -t txt _acme-challenge.andyjs.ch
 _acme-challenge.andyjs.ch descriptive text "jTyGIA9fojzT3n1EFxGxCj_2wUudkVg6pN7zSVACE"
Once you’ve correctly received the response you are expecting, go ahead and press Enter to Continue.
If all is successful, you will see a message that the command was successful, and it will display locations to several certificates and the private key.
Importing the Certificate in NSX-T Manager
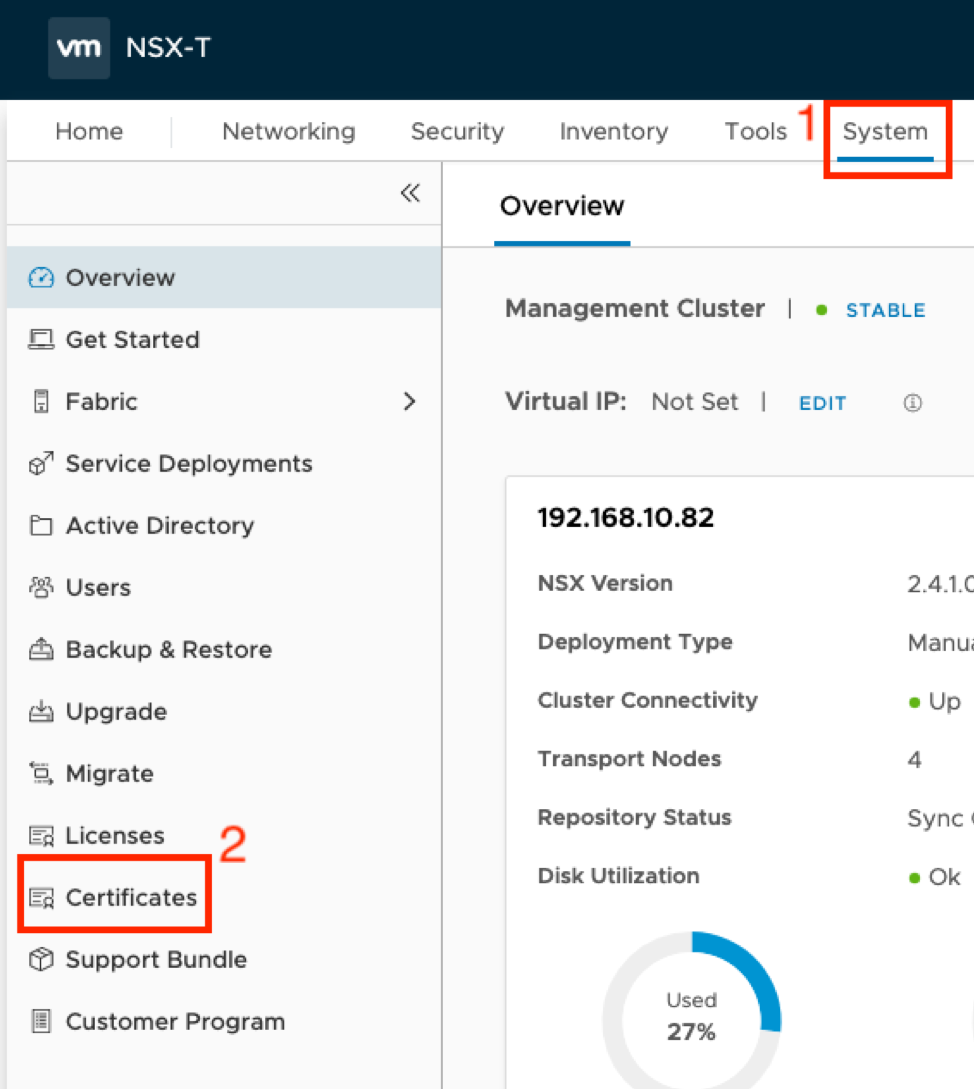
Next, let’s upload the certificate to NSX-T Manager. Login and navigate to System->Certificates:
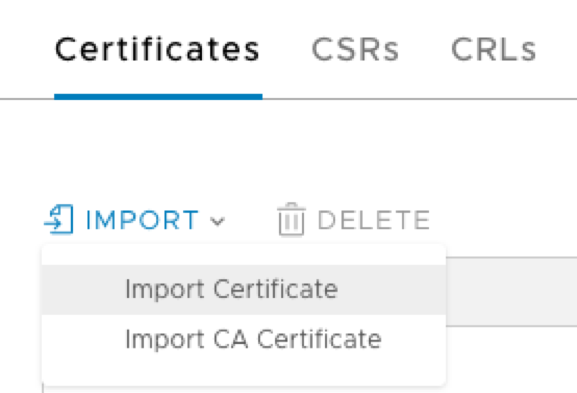
Click Import, followed by Import Certificate:
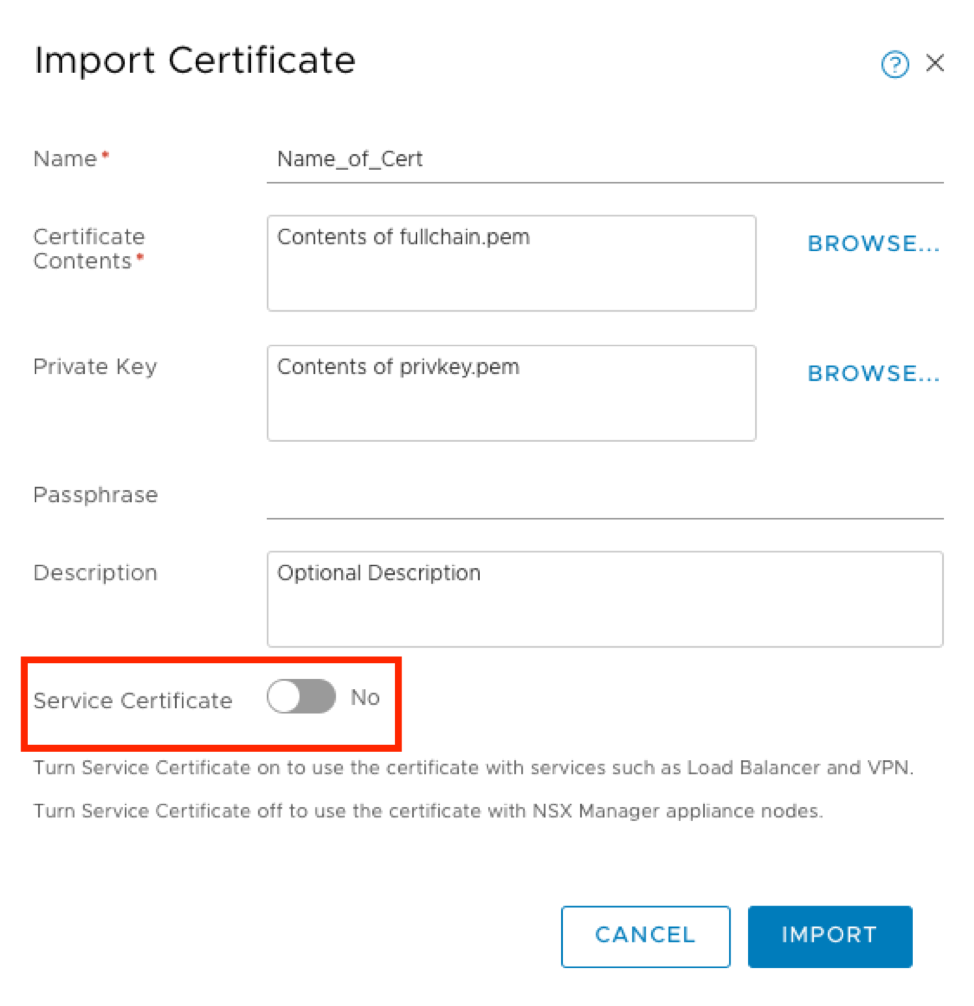
Enter a name for your certificate (it can be anything), import the Certificate Contents (fullchain.pem) and Private Key (privkey.pem) and an optional description.
The .pem files location is mentioned in the output from Certbot.
Important: Change the Service Certificate selector to No.
Finally, click Import:
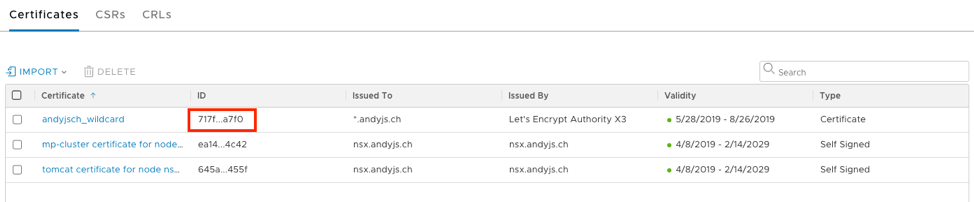
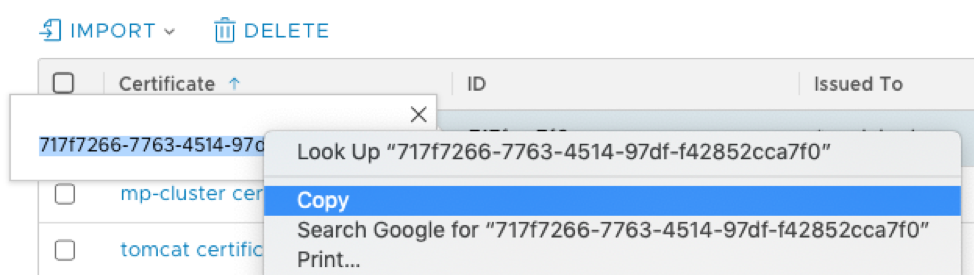
You should now see the certificate in the list of imported certificates. We will need to copy the ID of the certificate in order to craft our API call in the next step. Click on the ID field of your certificate to expose the full string, and copy/save it for the next step:
Applying the certificate to NSX-T Manager
The final step is to craft an API call to NSX-T manager. This will apply the certificate so that it is used when accessing the UI on HTTPS. I used Postman to apply my certificate, but it could also be achieved with Curl:

- Where certificate_id is the ID copied in the previous step.
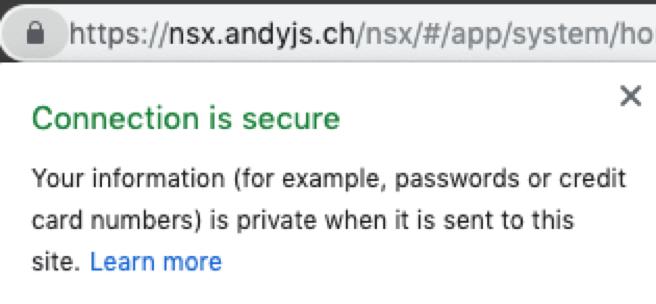
You should receive an HTTP 202 Accepted response with an empty HTML body. You may also notice that the NSX-T Manager UI will be unavailable for a few minutes while HTTP services restart.
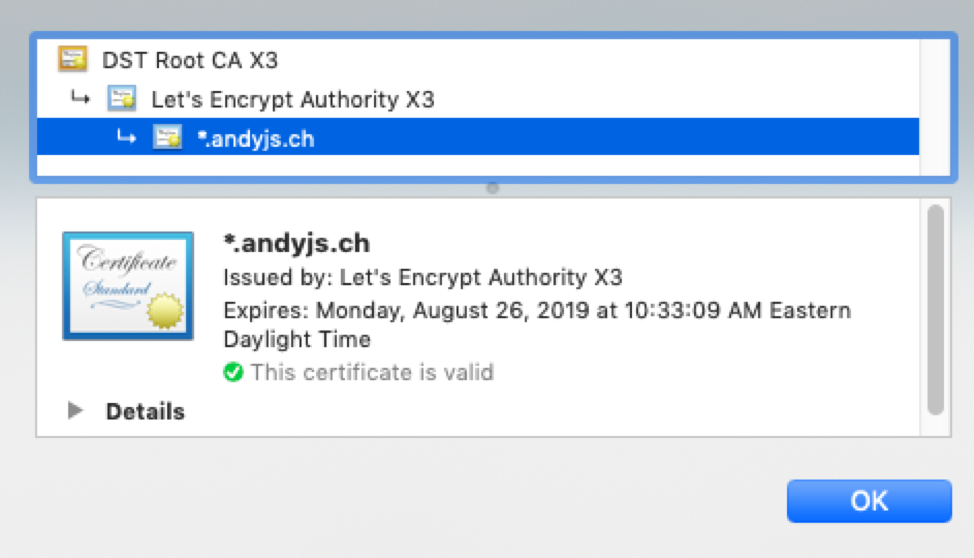
If all goes well, you will see a trusted certificate in your browser!
Next Steps
Now that I have a trusted certificate, the next question is how do I automate the renewal of the certificate? Perhaps I will explore that in a subsequent post. Cheers!